Free Roofing Invoice Template
Skip building invoices from scratch after a long day on the roof. Jobber’s free roofing invoice template generator helps you bill for tear-off, materials, and labor by the square in a few minutes. Fill in the job details, then download a professional invoice you can send right away.

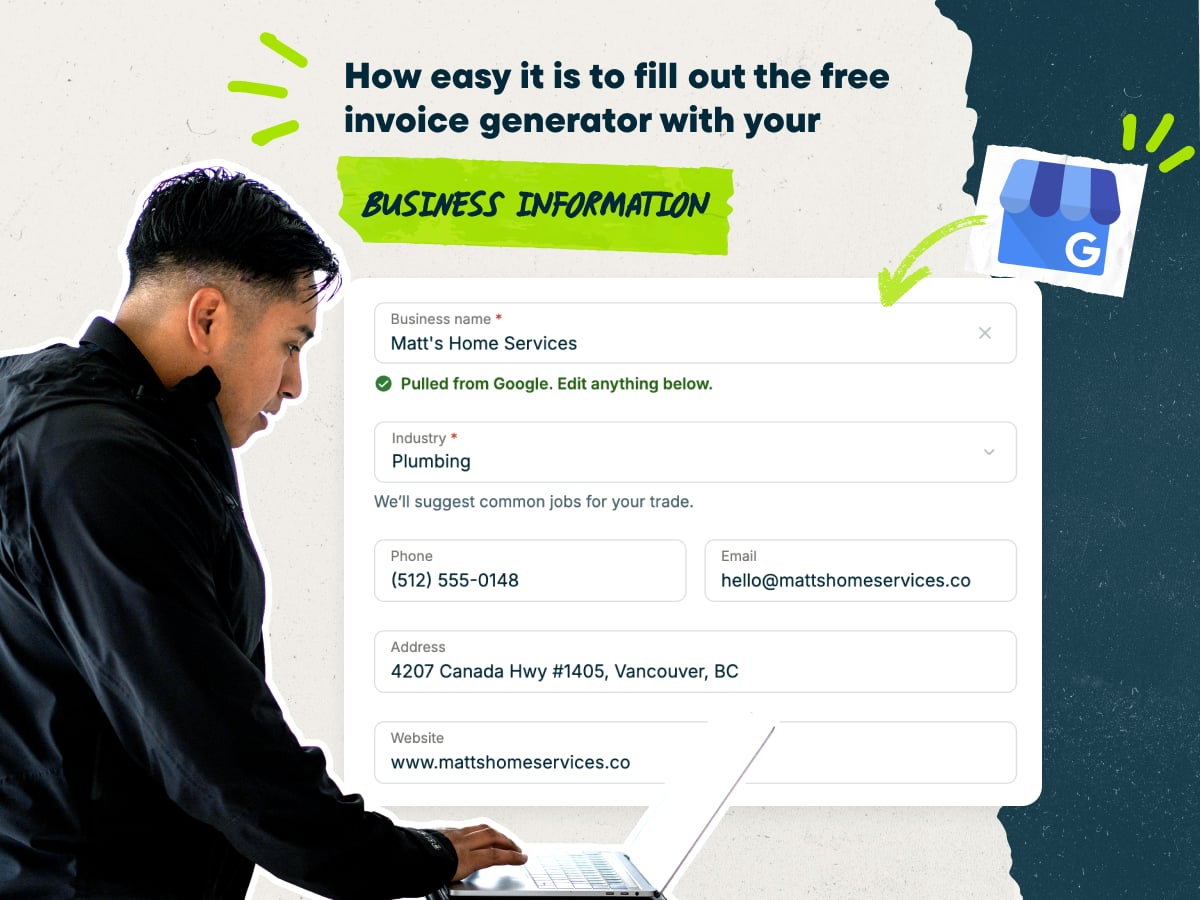
Create a roofing invoice fast with our free invoice template generator
- Enter your business name to auto-fill your company details
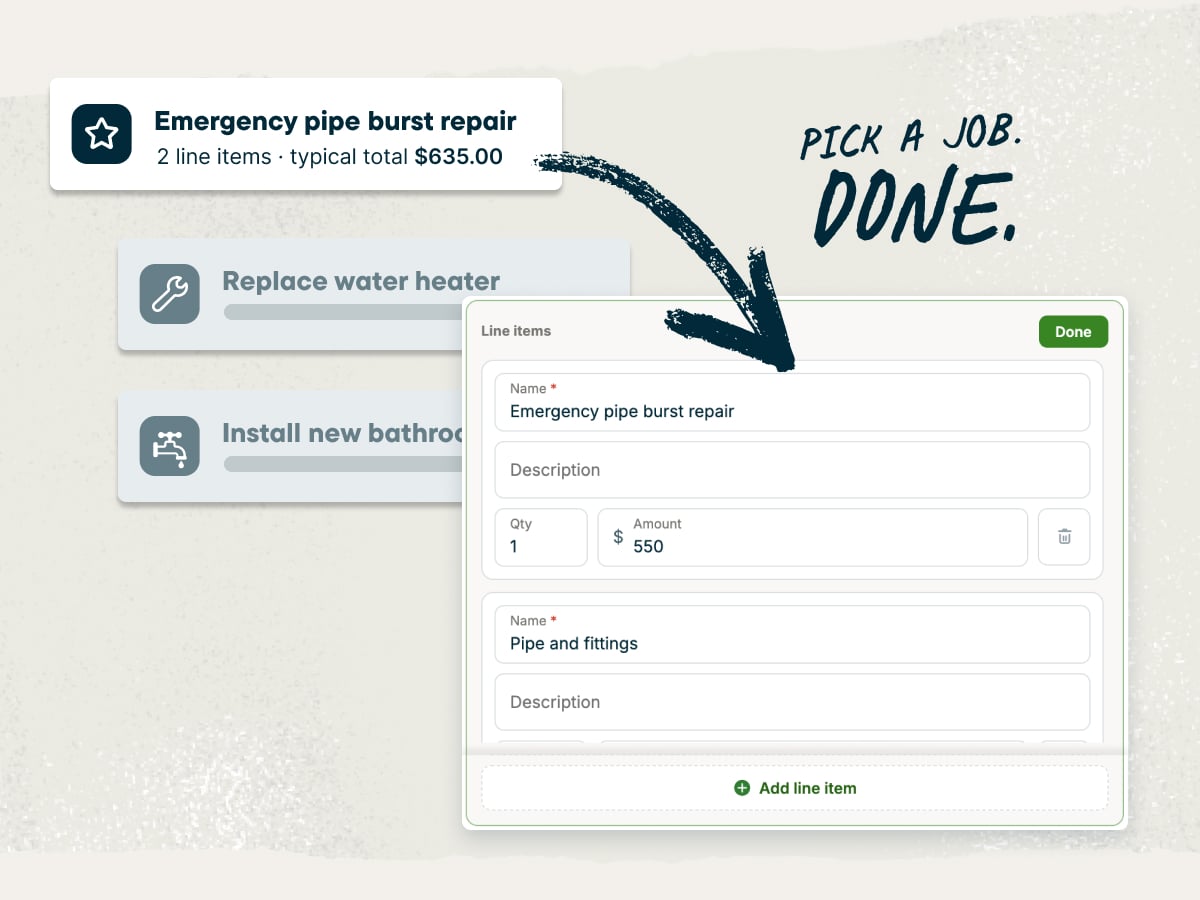
- Customize your line items, or pick pre-loaded options with typical pricing for roofing work
- Add your client’s name, contact details, and job site address
- Download your invoice as a PDF, or save it in Jobber to send and track it
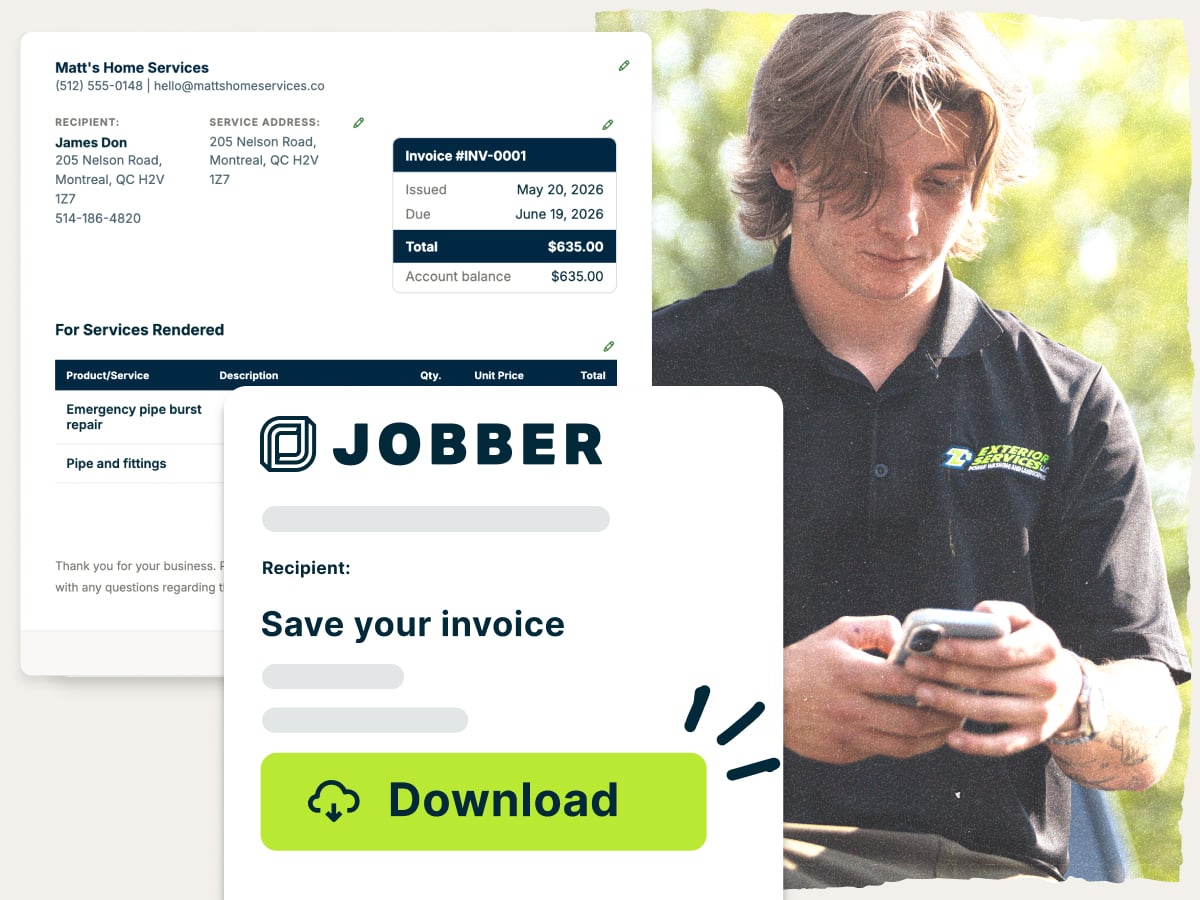
Why use Jobber’s free roofing invoice template generator?
- Ready to customize: Start with line items for common roofing services, then set your own price per square. Edit quantities for tear-off, underlayment, and shingles to match each roof
- Set up with the essentials: Every invoice has room for your business details, client info, materials, and payment terms. Homeowners get a clear breakdown of what they’re paying for
- Free to download: Download your roofing invoice as a PDF at no cost. Send it to your client the same day you finish the job
A roofing invoice template generator built for roofing businesses
Roofing jobs come with big tickets, multi-day schedules, and weather delays. The generator gives you a clean, itemized invoice that homeowners and adjusters can read at a glance. When you’re ready to quote, schedule, and get paid in one place, Jobber’s roofing software picks up where the generator leaves off.
Explore more Jobber free tools for your roofing business
Get the rest of your roofing paperwork and pricing sorted with these free tools:
Over 400,000 home service pros in 50+ industries trust Jobber
“Jobber’s made everything a lot more efficient, from putting together quotes all the way down to invoicing. In turn, that’s freed up a lot of time in my personal life.”

How to create a roofing invoice
You can create a roofing invoice in Microsoft Word, Google Docs, Microsoft Excel, or Google Sheets. That said, these templates often require you to spend more time on formatting and math. Use the roofing invoice template generator instead—it handles the layout and adds up totals for you, so you only have to fill in the job details.
Use these tips to write an invoice that homeowners understand and pay on time:
- Keep the layout clean. Put your business details at the top and the total due where it’s easy to spot. A clean page helps homeowners and adjusters find what they need fast.
- Describe each line in plain language. Write “Tear off one layer of asphalt shingles, 25 squares” instead of a shorthand code. One square equals 100 square feet, so explain the term for homeowners who haven’t heard it before.
- Separate labor and materials. List shingles, underlayment, and flashing separately from install labor. Homeowners see where their money goes, and you can check your margins on every roof.
- Attach photos of the work. Add before-and-after photos and any storm-damage photos to the invoice or job record. Date-stamped photos help answer questions from homeowners and adjusters.
- List change orders and supplements separately. Create a new line for any hidden damage, like rotten decking found during tear-off. That way, it’s easy to compare the original scope against the final bill.
- Set clear payment terms. State the due date, the payment methods you accept, and any late fees that may apply. This tells homeowners what’s expected and when.
- Send the invoice within 48 hours. Invoice while the job’s fresh for you and the homeowner. Waiting a week makes the bill easier to forget.
Need to create lots of invoices, fast? A single roof replacement can call for several types of invoices, including deposit, progress, and final invoices. Invoicing software turns each completed job into an invoice, so you don’t have to create each invoice from scratch.
What is the roofing invoice template generator best for?
The roofing invoice template generator is best for roofers who need a professional, itemized invoice fast without paying for software. Use it for jobs like these:
- Roof repairs: Bill for leak repairs, replaced shingles, or flashing fixes in a few minutes.
- Full roof replacements: Itemize tear-off, underlayment, shingles, and ventilation by the square.
- Insurance jobs: Match your line items to the adjuster’s approved scope so the claim stays easy to review.
- Deposits and progress billing: Send a deposit invoice before materials arrive and a final invoice when the roof’s done.
- Consistent branding: Keep your business name and contact details the same on every invoice you send.
What should be included in a roofing invoice?
A roofing invoice should include your business and client details, an itemized list of roofing work and materials, the total due, and your payment terms. Here’s what to include on an invoice for a roofing job:
- Invoice number: Give every invoice a unique invoice number so you and your client can track it.
- Issue date and due date: Show when you sent the invoice and when payment is due.
- Company information: List your business name, address, phone number, email, and roofing license number.
- Client information: Add the client’s name and contact details, plus the job site address if it’s different from their billing address.
- Line items: List each service, like inspection, tear-off, underlayment, shingles by the square, flashing, ventilation, gutters, and cleanup.
- Itemized costs: Break out labor costs, materials, permit fees, and disposal. Check local roofer hourly rates so your labor pricing covers your crew.
- Change orders and supplements: Add approved extra work, like decking replacement, as separate lines.
- Payments received: Show any deposit or progress payments the client has already made.
- Subtotal, tax, and discounts: Show the subtotal, any discounts, and sales tax before the final amount.
- Total due: Make sure the amount the client still owes is the most visible number on the page.
- Payment terms: Spell out your payment terms and accepted payment methods. Add workmanship and manufacturer warranty notes here, too.
- Thank-you note: Close with a short thank-you note to show the homeowner you value their business.
Some roofers also attach a lien waiver once the final payment clears. Requirements vary by state, so check local rules before you add a waiver to your invoice.
Free roofing invoice template generator vs. Jobber invoicing software
The free roofing invoice template generator creates a professional, itemized invoice. It works well when you need a clean invoice now and then. Just add your business and client details, list the work, download a PDF, and send it to the client.
Jobber’s invoicing software saves client and job details, turns completed jobs into invoices, and sends them by text or email. It also follows up automatically on unpaid invoices, which matters when you’re starting a roofing company and every payment counts. Jobber customers get paid 4x faster collecting payment online vs. waiting on checks.

and payment history organized in one place for easier access.
and pricing already recorded on the completed job.
making it easy for them to review and pay.
it is time to invoice at job completion or on a recurring schedule.
and send them to customers in a few clicks.
remind customers when an invoice remains unpaid.
so they can pay directly from their digital invoice.
while working from the office, on the road, or at a job site.
Frequently asked questions about roofing invoices
-
A roofing invoice template generator is a free online tool that builds a professional roofing invoice from the details you enter. Fill in your business and client details, services, rates, materials, and other job information. The generator formats everything, adds up the totals, and provides you with a free PDF that you can send the client.
-
Yes, you can customize every part of the roofing invoice template. Change line items, quantities, prices per square, and payment terms to fit each job.
-
Yes, you can download your roofing invoice as a free PDF. Print it, email it, or text it to your client. You can also save it in Jobber to send and track it later.
-
Yes, the roofing invoice template generator is free to use. There’s no cost to create and download a roofing invoice.
-
The fastest way to make a roofing invoice template is to fill in the generator with your business details and most common roofing services. Download the invoice, then reuse those line items on future jobs. Follow these invoice best practices to keep every invoice clear and consistent.
-
A roofing invoice should include your company details, client details, and the job site address. It should also list itemized roofing work and materials, payments received, the total due, your payment terms, and a thank-you note. A short thank-you note helps the homeowner remember you when they need gutters or a repair down the road.
-
A roofing invoice looks like a one-page document with your business details at the top and the total due at the bottom. An itemized table sits in the middle. Line items usually show quantities in squares, linear feet, or rolls, with a rate and amount for each. The page ends with payment terms, warranty notes, and a short thank-you note to the homeowner.

-
To invoice for an insurance roofing job, match your line items to the adjuster-approved scope and attach date-stamped photos of the damage and finished work. Use these tips to keep the claim easy to review:
• Match the approved scope. Use the same line items and quantities the adjuster approved. Matching lines make your invoice faster to check.
• Attach date-stamped photos. Include photos of the storm damage, the tear-off, and the finished roof. Photos prove to the adjuster that you completed the work.
• List supplements as separate lines. Add hidden damage, like rotten decking, as its own line once the supplement is approved.
• Show what the homeowner owes. List the deductible and any upgrades the homeowner chose. They’ll know their share before the final payment comes due.
Every policy is different, so confirm payment details with the homeowner and their insurer before work starts. Knowing how roofing companies work with insurance companies helps you plan for adjuster meetings and supplements. -
You can bill for roofing services by filling in the generator with your job details and sending the finished PDF to your client. Follow these five steps:
1. Enter your business name to auto-fill your company details.
2. Add your client’s name, contact details, and job site address.
3. Choose or edit line items for the roofing work you completed.
4. Set your payment terms and due date.
5. Download the PDF and send it to your client by email or text. -
The two words describe the same thing, but the document’s name varies depending on who’s holding it. You’ll send the homeowner an invoice, which is an itemized request for payment. The client will call it a bill when they pay it, since it’s something they owe you.
-
The difference between an invoice and a receipt is that an invoice asks your client to pay, while a receipt confirms they already did. Send the invoice when the roof’s done or a payment milestone hits. Send a receipt once the payment clears, using the free roofing receipt template.
-
The difference between a roofing quote and an invoice is timing. A quote shows what the job will cost before work starts, and an invoice asks for payment once the work is done.
Build your quote with the free roofing estimate template. In Jobber, an approved quote becomes a job and then an invoice, so you don’t have to re-add job details and create a new document from scratch. -
You can send a roofing invoice by email, by text, by mail, or in person. Email and text are fastest because homeowners can open and pay the invoice from their phone.
With Jobber, you can send invoices by text or email and let clients pay online with credit card processing. Customer communication tools keep your reminders and follow-ups in one place. -
The best time to send a roofing invoice is within 48 hours of finishing the job, while the work is fresh in your client’s mind. On large replacements, send a deposit invoice before work starts and progress invoices at set milestones. Job size and material costs help you decide whether to invoice before or after a job.
-
Your client should pay their roofing invoice within two weeks, and no later than net 30. For roof replacements, collect a deposit up front to cover materials. On multi-day replacements, bill progress payments at set milestones.
For big-ticket jobs, offer financing on the quote so homeowners can pay over time. With Jobber’s consumer financing, the client gets more time to pay, while you get paid in full when the job’s done. Clear terms, deposits, and progress payments all help you improve cash flow between jobs. -
Roofing invoicing software is a tool that creates, sends, and tracks invoices for your roofing jobs in one place. Jobber’s invoicing software turns completed jobs into invoices, sends automatic payment reminders, and lets clients pay online. It connects to quoting and scheduling, so job details carry over without retyping.
Over 400,000 home service pros in 50+ industries trust Jobber
“If you can make a quote on the spot, you’re 10 steps ahead of the competition.”
Jobber changed the game because it’s right at people’s fingertips.
