Free Roof Inspection Report Template
Roof inspections are a routine part of roofing work, whether you’re checking for storm damage, evaluating normal wear, preparing a property for sale, or documenting an insurance claim.
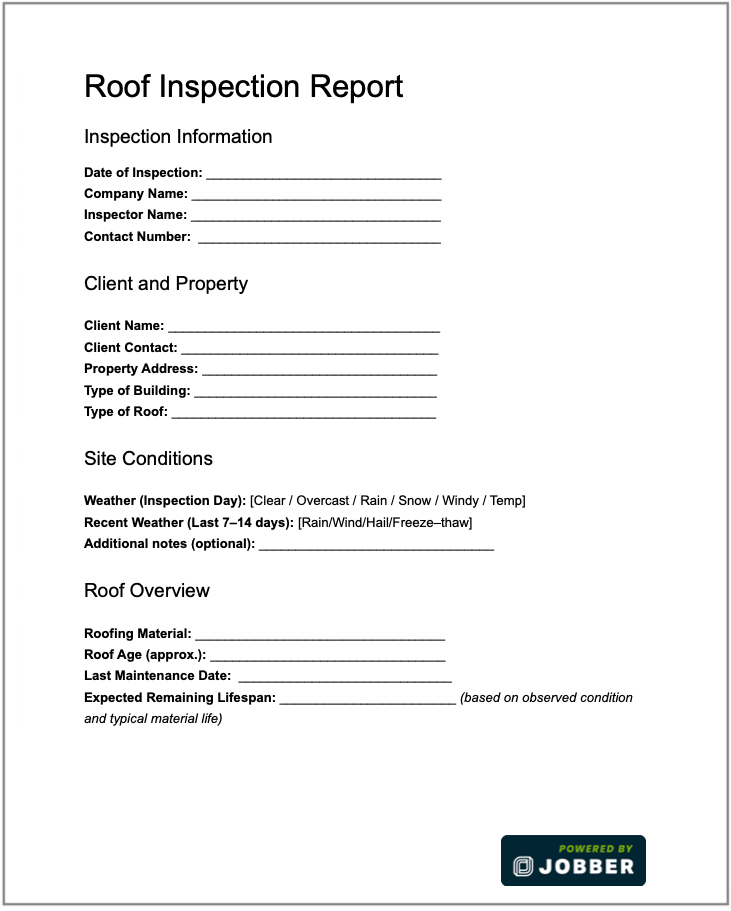
A roof inspection report summarizes the roof’s condition and helps you recommend repairs, maintenance, or insurance next steps. Use this free roof inspection form template to document residential and commercial roofing inspections.
Download Now
HELLO By clicking “Register now” I agree to Jobber’s Terms of Service and Privacy Policy. I understand that Jobber may contact my business by email using the information I have provided. Message & data rates may vary. For help, reply HELP. To Opt-out, reply STOP.
How to use this roof inspection report template
Follow these steps to complete your roof inspection checklist and fill out your inspection report:
- Write down the client’s name and property details.
- Inspect every part of the roof, both interior and exterior.
- Take detailed notes and photos of all areas, including damage, debris, or other conditions.
- Recommend any required roof maintenance or repairs.
- Sign and date the report when it’s complete.
- Send the report to the property owner on the same day, if possible.
- Save a copy of the report to the customer’s file for future reference.
What this roofing inspection report template includes
This roof report template gives you a consistent format for documenting the property’s roof condition, recording your observations, and outlining recommended next steps. Make sure to include these sections:
Client and inspection details
Start the report with basic information about the client, property, and roofing inspector. This includes:
- Client name, address, and contact details: Record the property owner’s name, property address, phone number, and email address.
- Date of inspection and weather conditions: Note when the inspection took place and the weather conditions at the time, especially if you’re documenting storm damage.
- Business name, inspector name, and signature: Identify the roofing company and inspector responsible for the inspection, with a signature to verify who completed the report.
Roof system information
Document the basic characteristics of the roof system. This helps provide context for your inspection findings and recommendations. Make sure to include:
- Building type: Identify whether the property is residential, commercial, or industrial.
- Roof type: Record the roof design, whether it’s pitched, flat, low-slope, gable, or another configuration.
- Roofing material: Identify the primary roofing material, like asphalt shingle, metal, tile, or slate.
- Roof age and lifespan: Record the age of the roof and its remaining lifespan, based on its current condition and the roofing material.
Exterior inspection fields
Use this section to record visible conditions and potential issues that you find while inspecting the roof’s exterior and related components. This should include:
- Physical roof damage: Document visible cracks, corrosion, missing or damaged materials, and signs of leaks or other damage.
- Gutters and drainage: Check gutters, downspouts, drains, and other components for blockages and damage that cause improper drainage or standing water.
- Eaves, soffits, and fascia: Record damage, rot, corrosion, deterioration, or other conditions affecting these areas.
- Roof penetrations, chimney, and flashing: Inspect vents, skylights, pipes, chimneys, flashing, and other roof penetration types for deterioration and water intrusion.
Interior and structural observations
Document conditions inside the building that could indicate damage, leaks, or ventilation issues that aren’t visible from the exterior. Your inspection should include:
- Interior and exterior wall conditions: Note stains, discoloration, cracks, or other wall conditions that could be related to roof or moisture problems.
- Leaks, moisture, or ventilation issues: Record water stains, damp areas, mold or mildew, inadequate ventilation, or other issues that you need to investigate further.
Documentation and next steps
Use the final section of the report to support your findings with visual evidence and provide recommendations for repairs. This is also the place where the client agrees that they received the report.
- Comments and photos: Add detailed notes about inspection findings. Include photos that show damage, areas of concern, or the overall condition of the roof.
- Maintenance recommendations: Outline recommended maintenance, repairs, further investigation, or replacement based on the roof’s current condition.
- Homeowner signature: Provide space for the homeowner or client to leave their signature, indicating that they received the inspection report.
Residential vs. commercial roof inspection reports
The information you document during a thorough roof inspection can vary depending on the type of property. That’s because:
- Residential roofs are often pitched and covered with asphalt shingles. They may have more individual penetrations to inspect, like chimneys, skylights, and attic ventilation.
- Commercial roofs are typically larger and are more likely to be flat or low-slope. They may use metal roofing materials and tend to have fewer chimneys and skylights.
You can use the same regular inspection report for both residential and commercial jobs. If a form field doesn’t apply to the roof you’re inspecting, just mark it “N/A” instead of leaving it blank. That way, it’s clear that you didn’t miss that part of the inspection by accident.
For larger commercial properties, you may need a longer inspection form or extra pages. Consider adding more sections to your roof inspection template for:
- Multiple roof areas, sections, or elevations
- Detailed damage assessments
- Drainage maps
- Maintenance history
- History of previous repairs
- Additional photos
You might also want more detailed documentation when you’re preparing the report for a property manager, homeowners’ association, insurance adjuster, or anyone else with specific reporting requirements.
Printable PDF vs. digital roof inspection forms
Printable PDF templates provide a consistent starting point for documenting roof inspections. But they can be hard to manage when you’re on job sites or completing multiple inspections in a day. Digital inspection forms can make it easier to complete, send, and store reports.
Limitations of paper and printable PDF templates
Paper and printable PDF forms can make extra work when you need to complete and deliver reports in the field. With paper forms, you’ll likely find yourself dealing with:
- No copies in the truck when an unexpected inspection comes up
- Messy handwriting that’s hard for clients, office staff, or insurance adjusters to read
- Extra daily admin from having to scan and email your reports to clients
- Lost reports when physical paperwork gets misplaced
Benefits of digital inspection forms in Jobber
With digital forms in Jobber’s roofing software, it’s easy to create standardized inspection reports and complete them out in the field. These forms let you:
- Create custom fields like including dropdowns, checkboxes, and photo uploads to collect consistent information during inspections.
- Standardize reports so every inspector uses the same form and reporting structure.
- Email completed inspection reports to customers from the field without returning to the office or scanning paper documents.
- Attach inspection reports to invoices, proposals, or customer CRM records.
- Access inspection records anytime without having to print and carry physical copies.
How to use Jobber for roofing inspections
Build custom inspection forms and checklists in Jobber to match the way you work and collect the information you need during inspections. Once you have a form in place—whether it’s our free template or a custom form—follow this simple three-step process:
- Complete the report on a mobile device while you’re on-site.
- Send the finished report to the client, along with your roofing proposal for repairs. If the job has already been approved, attach the report to your invoice once the work is done.
- Store the completed inspection report with the customer’s records in your roofing CRM.
Frequently Asked Questions
-
A roof inspection form is a standardized document that’s used to record the condition of a roof and its components during an inspection. This identifies any problems, allows for maintenance and repairs, and estimates the roof’s remaining lifetime. Roofing contractors use inspection forms for routine maintenance, storm damage assessments, pre-sale inspections, and insurance claims.
-
A roof inspection form template gives roofing contractors a consistent format for documenting every inspection. Instead of relying on handwritten notes or creating a new report from scratch, inspectors can follow the same structure to make sure all important information is recorded.
A standardized template also helps create professional-looking reports that are easier for customers and other stakeholders to understand. For insurance purposes, a detailed report can document the condition of the roof and provide supporting information for the claim. -
A roof inspection report template helps you:
• Create consistent reports for every inspection.
• Give customers a clear record of their roof’s condition with next steps.
• Reduce the time spent creating reports from scratch.
• Maintain records of past inspections to help guide future roof repairs.
• Position your roofing company as a professional operation with defined processes
Download our free roofing report template above and use it after your next inspection. You can also start using digital forms right away with Jobber’s job checklists. -
Regular roof inspections should happen once a year and after bad weather, like hailstorms, high winds, or heavy snowfall. It’s also a good idea to do an inspection as part of a property sale or when the owner notices signs of leaks or damage.
A roof may need to be inspected more or less often based on the roof’s age, material, condition, local climate, and manufacturer’s requirements. Older roofs and commercial roofing systems often require more frequent inspections or ongoing maintenance programs. -
Depending on where your business operates and your state’s building code, you might be required to include certain information in your roof inspection report. This can include:
• Your business name
• The inspector’s name, job title, and contact details
• The client’s name and contact details
• The property’s address and roof construction details
• Photos showing all slopes of the roof
• Photos showing all damage, hazards, and other issues
• A clear and detailed description of all damage
Requirements can vary depending on the purpose of the inspection and who will use the report. For example, insurers may want specific details about the date and cause of damage, affected areas, photos, weather events, and estimates supporting the claim.
For building code or regulatory purposes, requirements depend on the geographic area and the type of inspection. A standard roof inspection template likely won’t replace a required code compliance inspection report. Always check the requirements of the insurer or local jurisdiction before starting your report. -
Yes, you can use a roof inspection report template to organize and document information that may support an insurance claim. A clear report can help provide the insurer with a record of what the roofing contractor observed during the inspection. This includes written notes, photos showing the roof’s condition, and recommendations for repairs or replacement.
However, this roof inspection report template may not include every field or document that an insurance company or policy requires. Before the homeowner submits a report as part of a claim, they should check with the insurer to confirm what information needs to be included.