How to Avoid Construction Job Costing Mistakes: Common Errors to Watch

Key takeaways:
Learn how to avoid common construction job costing mistakes and protect your project profitability with these essential strategies.
- Track all job costs accurately and consistently. Ensure every expense, including labor, materials, equipment, and overhead, is tracked and allocated to the correct job as work happens.
- Avoid mistakes like vague cost codes, delayed labor entry, and missing receipts. Use clear, consistent cost codes and real-time tracking of labor and expenses to eliminate guesswork and prevent costs from slipping through the cracks.
- Use approved change orders for all extra work. Always get written client approval for additional work or changes to prevent scope creep and ensure you’re compensated for every task performed.
- Review job costs at set intervals, not just at the end. Conduct regular cost reviews throughout each project to catch overruns early, allowing you to make adjustments and protect your margins.
- Update your pricing using post-job reviews. After each job, compare estimated versus actual costs, identify variances, and refine your quoting process for future projects to improve profit accuracy.
Stay on top of industry best practices and get more tips on running a successful construction business. Sign up for the Jobber Newsletter.
Construction job costing mistakes like estimating errors, unapproved scope changes, and forgetting to include overhead all eat into your bottom line. Accurate construction job costing helps catch margin leaks before they become construction cost overruns.
Tracking costs throughout a job, setting consistent prices, and using change orders to document extra work help keep costs in check. Use these job costing strategies to avoid common mistakes and protect your profit on every job.
Preventing construction job costing mistakes:
What is construction job costing?
Construction job costing is the process of tracking all expenses related to a single job and comparing them to its revenue.
Start by adding up the direct costs tied to the contract, like labor and materials, as well as a percentage of indirect costs, like business insurance and office supplies. Then, you subtract them from the total price of the job to see how much you made.
The goal is to understand your numbers before they become a problem, like if your gross margin is too low or you aren’t sufficiently covering project costs.
With accurate records like job cost reports, you’ll be able to:
- Determine your gross construction profit margin on each job.
- See where costs were higher or lower than expected.
- Understand how you can price more accurately next time.
- Ensure future quotes cover costs and turn a profit.
Costs every job cost report should include
A good job cost report is detailed enough to cover every cost related to a specific job. That way, you’ll be able to see exactly how much you made and whether it was enough to cover expenses and generate profit.
Every job cost report should include:
- Crew and subcontractor labor hours
- Labor burden costs such as payroll taxes, workers’ compensation, and benefits
- All materials associated with a job, from lumber and flooring to nails and fixtures
- Equipment costs, including tool rentals, fuel, and wear on anything you own
- Permit fees and inspection costs
- Any other job-specific costs, like disposal fees or delivery charges
- A portion of overhead costs, such as office rent, field service management software, and utilities
Overhead allocation is how you spread shared costs across jobs so each one covers a portion of what it takes to keep your business running.
Direct costs and indirect costs
Direct costs are the expenses you can trace to a specific job. For example, this could include crew wages, drywall sheets, and a dumpster for a kitchen renovation.
Indirect costs are the shared costs that keep your business running no matter which jobs are in your schedule. They include expenses like software subscriptions, administrative staff wages, and bills for your crews’ work phones.
Because you can’t attribute indirect costs to a single job, you need a consistent way to divide them up. A common approach is to allocate overhead as a percentage of labor hours or revenue, and the rate depends on your business.
A simple way to calculate it is to take your annual overhead and divide it by your annual revenue. Then, apply it the same way on every job.
Work in progress and progress billing
Work in progress (WIP) billing refers to the total costs for a specific job before it’s finished. For example, that would be how much you’ve spent on a customer’s bathroom renovation halfway through the job.
It’s the best way to see whether the project expenses are on track before you send a final invoice. If you’ve done more work than you’ve billed a client for, it’s time to send another invoice.
If you’ve collected more than you’ve spent, it means you have funds to cover the rest of the job without project delays or covering costs out of pocket.
Progress billing is when you invoice customers at certain points during a project instead of asking for the total amount at the end of a job. For example, you may send an invoice once a month, when certain milestones are met, or at 50% completion.
Together, WIP and progress billing keep costs in check and support healthy cash flow by giving you set points to review costs. They’re especially useful on long jobs with extended timelines and large price tags.
Common job costing mistakes that drain your margin
Many construction job costing mistakes are small and easy to miss, like a lost receipt or an extra task a crew did as a favor. But when you add them up, they can turn what would have been a profitable job into one that barely breaks even.
Small margin leaks are easy to ignore, but this service pro shows how quickly they can add up:
Use this table to see what you could be missing and how to address it.
| Job costing mistake | What it causes | How to prevent it | When to check |
|---|---|---|---|
| Using vague or inconsistent cost codes | Budget differences you can’t trace back to a single cause | Use a short, consistent code list that covers your most common services and charges | Before you quote a new job and whenever you add a new code |
| Recording labor after the fact | Guessed hours and missing labor burden | Track time as it happens and approve work on a set schedule | Daily entries and weekly approvals |
| Missing material and equipment costs | Receipts, purchase orders, and rentals that are never billed to a job | Log every purchase to the right job the day it’s made | Same day, with a weekly check against vendor invoices |
| Applying overhead inconsistently | Jobs that look profitable but aren’t | Use one method to calculate and apply overhead and keep it consistent for every job | When you set your overhead rate and whenever it changes |
| Starting extra work without approved change orders | Scope creep and work you never bill for | Get written client approval and an updated quote for any additional work or material costs | Before any added work begins |
| Waiting until a job ends to review costs | Catching overspending when it’s too late to fix | Review costs at set checkpoints during each job | At each billing milestone |
| Reusing old pricing without a post-job review | The same pricing errors repeated on future quotes | Compare actual vs estimated costs and update pricing | After every job closes |
1. Using vague or inconsistent cost codes
Cost codes are the labels you use to sort every expense on a job. When your labels are too broad or inconsistent, they don’t actually cover the specific costs of a job, leading to accidental overspending.
Let’s say you’re doing a bathroom remodel that comes in $2,000 over budget. With vague codes, you know you went over budget but can’t tell what those extra costs were. Short, specific codes will tell you whether they came from a tile upgrade or messy demolition.
Keep your code list short and match it to how you estimate a job. For example, if you use itemized quotes to separate costs for demolition, finish work, and clean-up, you should have a separate entry for each in your cost code list, too.
2. Recording labor after the fact
Writing down labor after a job’s done results in a lot of guesswork, leading to muddied hours and weak labor cost tracking. Every rounded hour also carries wage and labor burden, like payroll taxes and workers’ compensation. This makes it nearly impossible to see the job’s true cost.
For example, say it takes your team three days to build a deck, and the team lead doesn’t record any labor until Friday evening. They estimate 24 hours’ worth of labor, but forget to include the extra six hours it took to pick up lumber and haul away the old decking.
That’s time your crew worked and you paid for, but was never billed to a client or tied to a job. And if you build your next deck quote on the same numbers, you’ll be undercharging again.
Your employees need to enter labor hours daily to ensure you’re including drive time, setup, and rework. That way, the cost is accurate and accounted for on every job.
3. Missing material and equipment costs
Material cost tracking is only as accurate as the receipts and invoices tied to a job. Unrecorded purchase orders, vendor invoices, and receipts for rentals and equipment costs reduce accuracy and hide the true costs of a job.
If you quote $3,500 in materials for a retaining wall, but forget to include the $500 skid steer rental, your costs will be $4,000, eating into your profit margin. And if you use that same quote for a similar job, you’ll be undercharging on every retaining wall you build.
Log every purchase to the job the day it happens to prevent missing costs. Then make sure to check material costs for past jobs when you’re quoting similar jobs in the future.
4. Applying overhead inconsistently
Overhead allocation only works if you apply it the same way every time. If you charge 10% on one job and 25% on another, your job cost report won’t show you what you actually earned.
Instead, a job that made money can look like a loss, and a job you undercharged for could look like it turned a profit.
For instance, say you did two similar bathroom remodels for $12,000 each. One was charged $1,200 in overhead and the other $2,400. The second job looks $1,200 less profitable, even though the work was the same.
Pick a single method and have your accountant review it so it fits your business. Then use that method on every job.
5. Starting extra work without approved change orders
Change orders ensure you get paid for work that wasn’t in the original quote. When a client asks for extras, or a project goes beyond the initial scope, you need written approval before you can add those changes to the invoice total.
If you don’t ask a client beforehand, or you do the work without documenting it, you’ll end up working for free. Your cost forecast will take a hit too, since the job will cost more than the numbers you’ve been tracking.
Change orders document a client’s approval before any additional work begins. Use one to get scope creep and added costs in writing so you don’t have to cover them out of pocket.
6. Waiting until the job ends to review costs
When you do a cost review at the end of a job, it’s too late to make a change order, add a missed receipt, or adjust crew hours. That means you’ll have to find another way to cover unexpected costs.
Instead, review job costs at predetermined points during a job, based on project length and billing milestones, such as:
- Once a week on shorter jobs
- Once a month on large construction projects
- At 25%, 50%, and 75% completion
7. Reusing old pricing without a post-job review
On a job, material costs, labor estimates, and production rates can change while the original quote stays the same. If you reuse old pricing for future jobs without making adjustments, you’ll repeat the same error in every quote.
For example, if material costs have increased across the board because of supply issues, but you don’t account for it in your pricing, it will eat into your profit across multiple jobs.
After each job, do a cost review to compare what you quoted to what it really cost, then update your template with the new numbers.
How to prevent construction cost overruns
Construction cost overruns rarely come from one big mistake. They build up from small margin leaks caused by inconsistent processes and unclear expectations. Follow these practical steps before, during, and after each job to avoid cost overrun issues:
1. Build the job budget before work starts
Building a construction estimate is essential for keeping costs in check before a job begins. To ensure your quotes are accurate, include separate lines for:
- Labor
- Materials
- Subcontractor costs
- Equipment rentals
- Overhead
- Contingency
By categorizing construction pricing, you ensure each cost is accounted for, and you have something to measure against once the work begins.
Set consistent cost codes
Once you have an itemized quote, give every line a cost code so expenses land in the right category as work progresses. Make sure your codes match your quotes and how you do the work.
For example, if you separate demolition, framing, plumbing, and finish work in your quotes, each should have a unique code.
Keep your list specific enough to diagnose problems, but simple enough to ensure your crew uses codes properly and to prevent unnecessary admin.
Set a contingency and cost-review schedule
Contingency is money you set aside for unexpected costs during a job, like hidden water damage or material price jumps. How much you need depends on the project’s risk and scope.
For a routine job, such as a simple fence install on a clear lot, you may need very little contingency. But for a renovation in an older home, you’ll want a bigger cushion because you won’t know what the work will actually entail until demolition begins.
To stay on top of costs throughout the job, set review points before the work begins. Use change orders to document additional costs for unexpected tasks.
2. Track labor, materials, and expenses as work happens
Cost tracking works best when it’s done the same day. An effective workflow for documenting expenses consistently includes these steps:
- Crews take pictures of receipts before leaving a site or supplier.
- Crew leads confirm each day’s materials and labor before heading home.
- Office staff enter purchase orders and vendor invoices against the job as they arrive.
Assign responsibility for each task to a specific person so records between the field and office stay current.
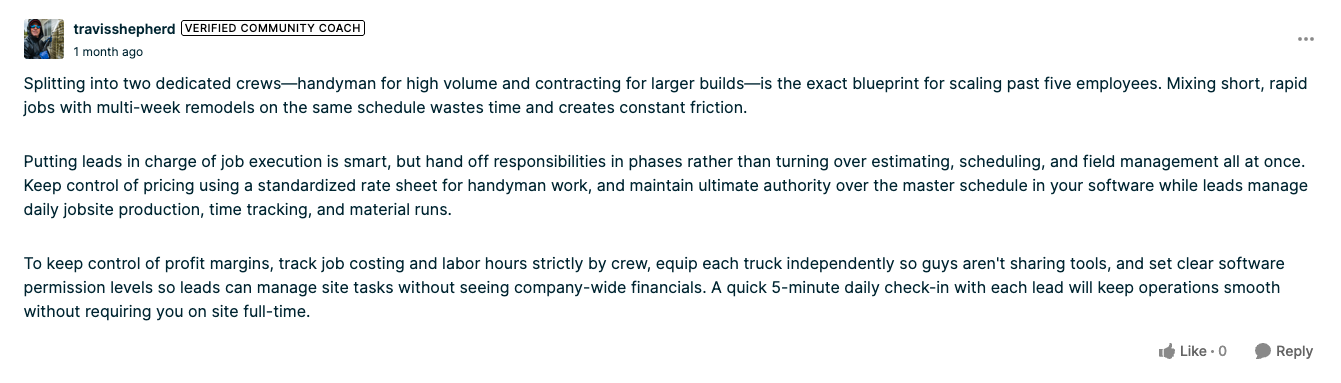
When a general contractor in the Jobber Community asked how to split his business into two crews, a Jobber Community coach recommended tracking labor hours and job costs by crew to keep control of profit margins.
Capture labor hours and labor burden
Capturing labor hours and labor burden happens in three steps:
- Individual crew members track their time from the moment they arrive at work to when they leave the job site.
- The crew lead reviews their timesheets for the day and hands them off to the owner or office manager.
- The owner or office manager approves timesheets on a set weekly schedule and applies a predetermined percentage for labor burden to approved hours.
Because hours are tracked by each individual crew member, you can compare how long each one takes on similar jobs, giving you insight into production differences.
Then, you can use that information to improve training, create standard operating procedures, adjust schedules, or address issues slowing crews down.
Capture material and vendor costs
Every receipt, purchase order, and vendor invoice needs two tags: the job it belongs to and the cost code it falls under. To capture expenses and keep them organized, make sure:
- Crews photograph receipts and invoices and note the job they belong to before leaving a supplier.
- You include job names or numbers on purchase orders when you create them.
- You match invoices to purchase orders as they come in, then check them against logged receipts.
- Crew members log each expense under the right job and cost code as it comes in.
3. Document change orders before added work begins
Change orders help you prevent extra client requests from turning into out-of-pocket costs. To start using change orders in your construction business:
- Describe what’s being requested in plain language, like an additional light fixture installation in the bathroom.
- Price out the additional costs, including labor, materials, and equipment.
- Note any impact it will have on the initial schedule, like an extra day of work.
- Send the client an updated quote with the new total.
- Only start the work once you have written approval for the new amount.
4. Compare estimated and actual costs after every job
When a job closes, compare what you quoted against the actual cost, category by category. That means reviewing how much you charged and spent for labor, materials, equipment, subcontractors, and overhead.
If there are any gaps, this can help you identify a cause, like higher materials costs. Then, you can carry that information into the next quote so you don’t lose money on future jobs.
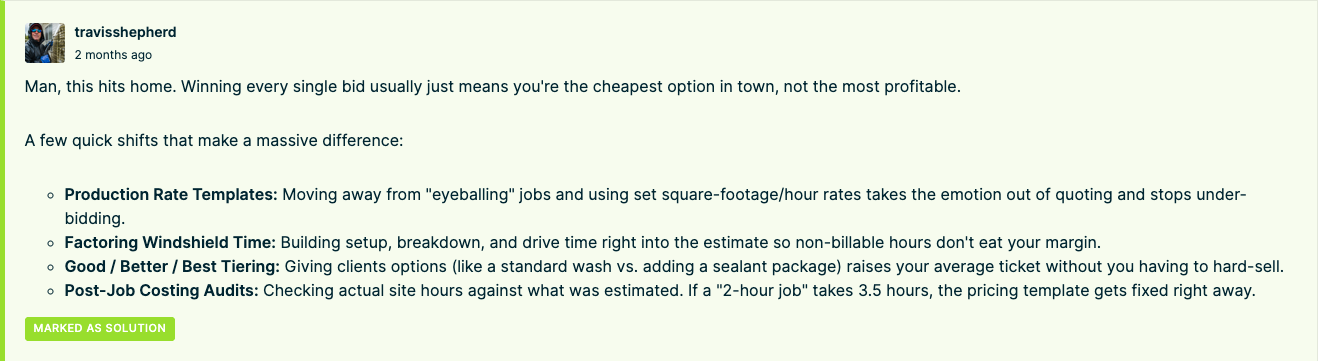
A Jobber Community member uses post-job costing audits to compare actual site hours against cost estimates, then updates pricing templates—like when a job is two hours on paper but turns into three and a half in the field.
This shows how a single audit can improve pricing in the future, helping you turn a bigger profit.
Turn budget variance into better pricing
Once you know why a job came in over budget, use that knowledge to price construction jobs more accurately. Instead of changing prices reflexively, pay attention to trends and make adjustments based on verified results when:
- Your production assumptions need to be revised, like if crews are consistently taking 30 hours to complete similar jobs you’ve been quoting for 24.
- Supplier costs increase for materials and supplies or equipment rentals.
- You need more contingency to cover a higher-risk job.
Apply these changes to your quote templates so they’re accurate going forward.
5. Use job cost reports to spot margin leaks sooner
Consistent reviews help you to spot margin leaks before they become big problems. It’s best practice to complete a job cost report for every completed job to review:
- Labor
- Subcontractor costs
- Materials
- Expenses
- Receipts
- Project profitability
For longer jobs, set checkpoints before the work begins and evaluate costs as you go. It’s the best way to identify overspending and scope creep early so you can document extra work with a change order.
Construction management software like Jobber connects tracked labor, materials, expenses, receipts, and profitability reporting to each job, making it easy to see where you stand.
Use Jobber to keep job costs connected
Jobber keeps job costs in one place so you don’t have to piece them together at the end of a contract. It reduces your workload by:
- Using time tracking to calculate labor based on actual time logged against the job
- Recording materials, expenses, and receipts and attaching them to specific jobs from the field with the Jobber app
- Creating customizable profitability reports for every job so you always know how much you made
Protecting project profitability on every construction job
Job costing mistakes happen. What keeps them from hurting your construction business is identifying them early and implementing fixes before they eat into profit.
Use consistent cost codes, input expenses as they come in, and regularly review job costs to help protect your bottom line. Then, take what you learn from each project to the next. That way, your quotes always show accurate and consistent pricing.
Frequently Asked Questions
-
You only need to review costs for simple or standard jobs after the work is complete. Depending on the project, you may also want to review the work midway through. For longer, more complicated, or high-risk jobs, review costs at regular checkpoints. For example, at 25%, 50%, and 75% completion or at each billing milestone, like once a month.
-
Estimating takes place before a job begins and predicts the costs associated with the work. It’s what you send to clients to tell them how much they can expect to spend. Job costing tracks what the work actually costs as it progresses or once it’s finished. Use it to identify margin leaks and improve your future construction cost estimation.
-
One person should own the job costing process. That could be the business owner, an office manager, or a bookkeeper who makes sure the records are complete, runs reviews, and follows up when something is missing. Having one person in charge leaves less room for lost documentation like forgotten timesheets or receipts. However, field staff, office staff, and business owners all contribute to job costing by supplying receipts or reviewing records.